Wire-wrapped rings are a popular and versatile type of handmade jewelry, allowing crafters to combine various materials like beads, gemstones, and metal wire into intricate, eye-catching designs. This DIY project is ideal for beginners and jewelry enthusiasts who want to try something creative and unique. In this guide, we’ll walk through the tools, materials, and step-by-step instructions to make your first wire-wrapped ring.
(How to Make Wire Wrapped Rings)
Tools and Materials Needed
Before you get started, gather the following basic tools and materials:
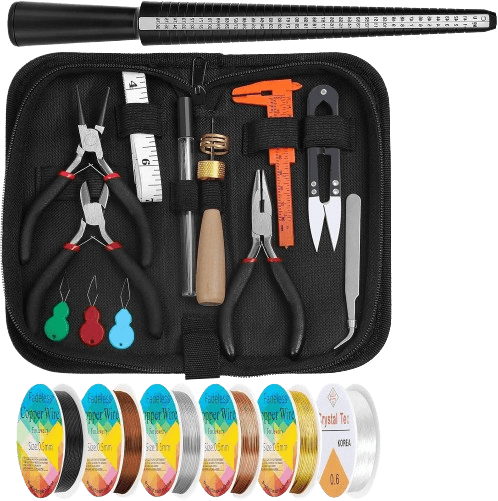
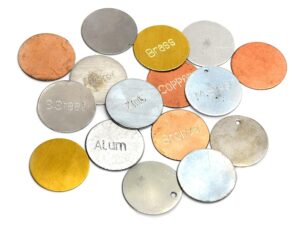
- Jewelry Wire: Use soft or half-hard wire in a gauge between 18 and 22 for easy wrapping. Copper, brass, or silver wire are great for beginners.
- Ring Mandrel: A tapered tool used to shape and size rings.
- Round-Nose Pliers: These are essential for creating loops and curves in the wire.
- Chain-Nose Pliers: Used for holding and tightening the wire, especially in tight spots.
- Wire Cutters: To trim the excess wire cleanly.
- Beads or Gemstones: You can choose any bead or gemstone that fits the style you want for your ring.

Step-by-Step Instructions
Step 1: Cut the Wire
Cut a piece of wire that’s about 10-12 inches (25-30 cm) long. The exact length depends on how many times you want to wrap the wire around your bead or stone. A shorter length will give you fewer wraps and a more simple design, while a longer wire allows for more wraps, making the ring look more complex and sturdy. Start with a longer piece if you’re unsure—you can always trim the excess later!
Step 2: Place the Bead or Gemstone
After cutting the wire, pick a bead or gemstone you want to use as the centerpiece of your ring. Thread the wire through the hole of the bead or gemstone, placing it exactly in the center of the wire. You’ll want both ends of the wire to be equal in length. This bead will become the focal point of your ring, so choose one that complements the style you want.
Step 3: Start Wrapping
Once your bead is in the center of the wire, it’s time to start shaping the ring. Place the wire on a ring mandrel at the size you want your ring to be. A ring mandrel is a tapered tool with ring sizes marked, but if you don’t have one, you can use any round object like a thick marker or tube.
Hold the bead against the mandrel to keep it in place, and then take one side of the wire and wrap it around the mandrel, keeping the bead in the center. Do the same with the other side of the wire. The bead should stay in the middle, with both wires wrapping tightly around it. Wrapping the wire a few times around the bead gives the ring stability and adds decorative layers.
Step 4: Shape the Band
With both sides of the wire now wrapped around the bead, you’ll need to create the band part of the ring. Continue wrapping the wire around the mandrel to form the band. You’ll want to keep the wire wraps close together, making sure they lie neatly next to each other. Wrap the wire at least two times around the mandrel to form a sturdy band. The number of times you wrap the wire will determine how thick the band is—more wraps make a thicker band.
Step 5: Secure the Wires
After forming the band, it’s time to secure the ends of the wire. Use your chain-nose pliers to tuck the loose ends of the wire into the existing wraps. This prevents the wire from poking out or coming undone. Make sure you smooth down any sharp edges by carefully pressing the wire ends flat. This step is important for comfort, as you don’t want sharp wire poking your skin when you wear the ring.
Step 6: Final Adjustments
After securing the wires, slide the ring off the mandrel and take a look at the overall shape. If it seems a bit uneven, you can gently adjust it with your fingers or use round-nose pliers to shape the ring further. This step ensures the ring looks balanced and fits comfortably.
Step 7: Polish and Finish
Once the ring is shaped to your liking, use a soft polishing cloth to smooth out any scratches or marks on the wire. Gently buff the wire to give it a nice shine. This step not only improves the ring’s appearance but also removes any oils from your hands or fingerprints left during the wrapping process. Now, your wire-wrapped ring is ready to wear!
Common Beginner Mistakes to Avoid
- Using the Wrong Wire Gauge: Beginners often choose a wire gauge that is too thick or too thin. For starters, stick with 18 to 22 gauge wire for optimal flexibility and strength.
- Cutting Insufficient Wire Length: New crafters may cut the wire too short, limiting their wraps. Start with a length of at least 10-12 inches (25-30 cm) to give yourself room for creativity.
- Not Centering the Bead Properly: Failing to position the bead evenly can lead to an unbalanced ring. Ensure both wire ends are equal before wrapping.
- Inadequate Wrapping Technique: Not wrapping the wire tightly can lead to a loose ring. Wrap firmly and practice your technique for better results.
- Neglecting to Secure Loose Ends: Leaving sharp wire ends exposed can cause discomfort. Always tuck loose ends securely and smooth any sharp edges.
- Ignoring Final Adjustments: Skipping the step of checking the ring’s shape can lead to an uneven look. Take time to inspect and adjust the ring for comfort and fit.
- Not Practicing Patience: Many beginners become frustrated if they don’t achieve the desired look immediately. Remember, practice makes perfect!
- Overcomplicating Designs: Trying complex designs too soon can lead to confusion. Start with simple projects before moving to more intricate designs.
Tips for Beginners
- Start with Copper Wire: Copper is affordable and easy to manipulate, making it a perfect choice for your first projects. As you gain confidence, you can explore more expensive materials like sterling silver or gold-filled wire.
- Practice on Scrap Wire: Before starting your final piece, use scrap wire to practice your wrapping technique. This will help you feel more comfortable with the tools and improve your skills without wasting materials.
- Keep Your Workspace Organized: A tidy workspace can help you focus and reduce frustration. Use trays or containers to keep beads and tools organized, preventing them from rolling away or getting lost.
- Experiment with Designs: Don’t hesitate to try different bead placements or wrapping techniques. This experimentation is where you’ll discover your unique style and creativity.
- Take Breaks When Needed: If you feel stuck or frustrated, take a break. Stepping away for a few moments can provide a fresh perspective when you return.
Popular Design Variations
- Double Stone Wire-Wrapped Ring: Instead of one bead, use two smaller gemstones to create a balanced look.
- Swirl Design: After wrapping the wire, create decorative swirls with the extra length for an artistic finish.
- Hammered Wire Ring: After wrapping, you can gently hammer the wire band for a textured, rustic look.
Frequently Asked Questions (FAQs)
1. What materials do I need to make a wire-wrapped ring?
Ans: You’ll need jewelry wire (18 to 22 gauge is recommended), a ring mandrel or a round object, round-nose pliers, chain-nose pliers, wire cutters, and beads or gemstones of your choice.
2. Can I use any type of wire for my ring?
Ans: It’s best to use soft or half-hard wire made from materials like copper, brass, or sterling silver. Copper is ideal for beginners due to its flexibility and affordability.
3. How do I determine my ring size?
Ans: You can measure your finger with a measuring tape or use a ring mandrel to find the appropriate size. Consider the width of the band; wider bands may require a slightly larger size for comfort.
4. What if my wire gets tangled or knotted?
Ans: If your wire tangles, gently unwind it by hand. Avoid pulling hard, as this can kink the wire. Keeping your workspace organized can help prevent tangling.
5. How can I make my wire-wrapped ring more secure?
Ans: Ensure your wire wraps are tight and secure the loose ends by tucking them in or trimming them carefully. You can also consider using a thicker gauge wire for added strength.
6. Can I use multiple beads in one ring?
Ans: Yes, you can use multiple beads! Just ensure that the total size fits comfortably on your finger and that the wire can support the design.
7. What are some common mistakes to avoid when making wire-wrapped rings?
Ans: Common mistakes include using the wrong wire gauge, cutting the wire too short, not centering the bead properly, and failing to secure loose ends. Practicing patience and starting with simple designs can help.
8. Is there a way to make my wire-wrapped ring unique?
Ans: Absolutely! Experiment with different bead shapes, wire colors, and wrapping techniques. You can also add decorative elements like swirls or twists in the wire.
9. How do I clean my wire-wrapped ring?
Ans: Clean your wire-wrapped ring with a soft polishing cloth to remove any oils or dirt. For tarnished metal, use a gentle jewelry cleaner suitable for your wire type.
10. Where can I find more inspiration for designs?
Ans: Online platforms like Pinterest, Instagram, and YouTube have a wealth of tutorials and inspiration for wire-wrapped ring designs.


